Osmond, a Stupid Sock Creature

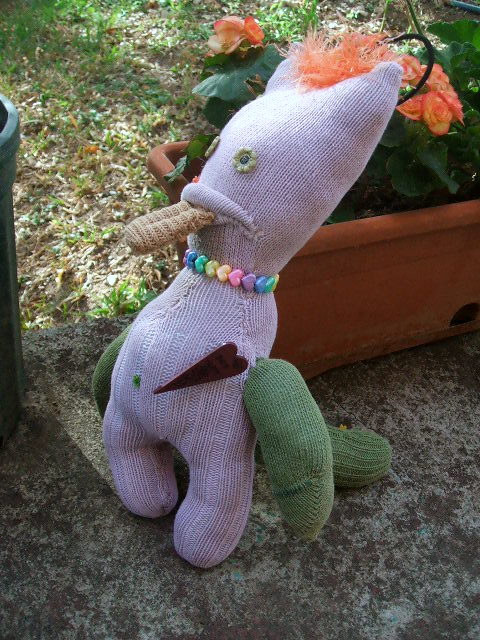
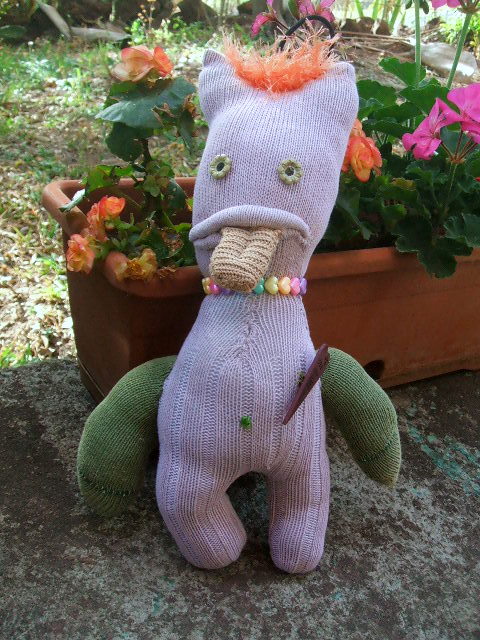
A couple of years ago, I bought this book, Stupid Sock Creatures by John Murphy. I think I may have seen them on t.v. somewhere, and thought they were just about the coolest things I’d ever seen made from socks. It took me a few years, but yesterday I finally had a go at attempting to make one of them. And thus Osmond was born.

Osmond

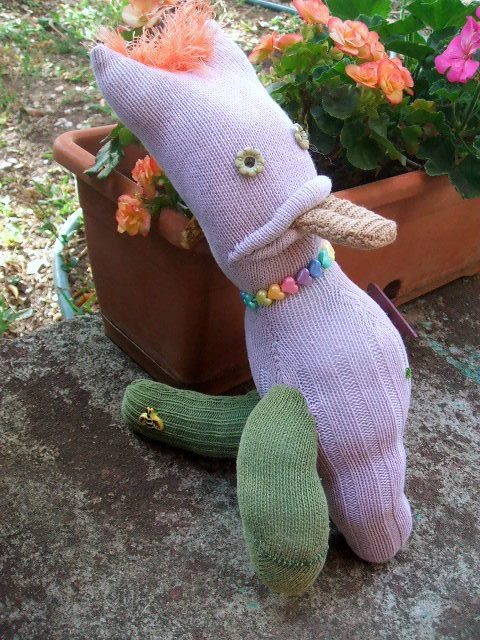
Osmond

Murphy’s book is great: excellent directions for making several different kinds of sock creatures, and lots of ways you can use up extra pieces and customize your sock creatures. I put hair on Osmond using some eyelash yarn that I had no idea what to do with, a couple of buttons, a belly button and a heart bracelet that I found on the floor of my son’s playroom. The book is also really funny! If you think you might be into making a sock creature of your own, I highly recommend this book.

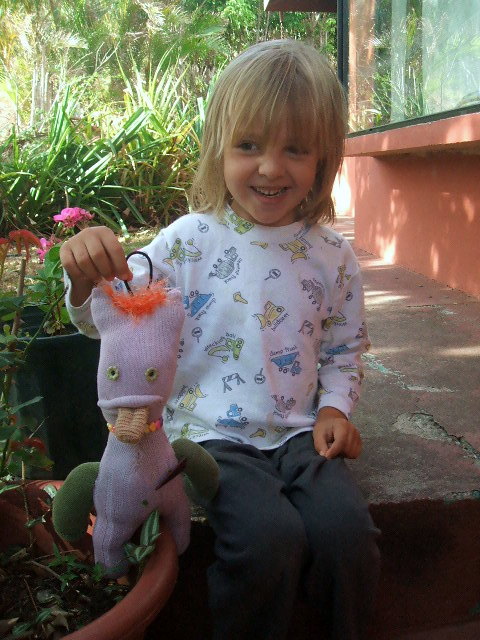
My son adores Osmond!

My son adores Osmond!

Each of the sock creatures in the book has its own background and story, and Osmond is no different. His story sort of wrote itself as I made him: I imagined where he came from, what he liked to do, etc. My son comes up with all sorts of imaginative ideas about Osmond the longer he hangs out with him, such as, Osmond does not like the cough medicine my son has to take, but Osmond does enjoy riding in the car.

Osmond wears his heart for all to see. It says, "Bee Happy." Osmond's fondest wish is to perform on stage with Marie (Osmond, of course). He likes tending to the plants in the garden, but is not overly fond of salad.

Osmond wears his heart for all to see. It says, "Bee Happy." Osmond's fondest wish is to perform on stage with Marie (Osmond, of course). He likes tending to the plants in the garden, but is not overly fond of salad.

Osmond is not allergic to bees, which is good, as one has landed on his tail. And, while he looks from profile like he is smoking a stogie, he's actually just sticking out his tongue.

Osmond is not allergic to bees, which is good, as one has landed on his tail. And, while he looks from profile like he is smoking a stogie, he's actually just sticking out his tongue.

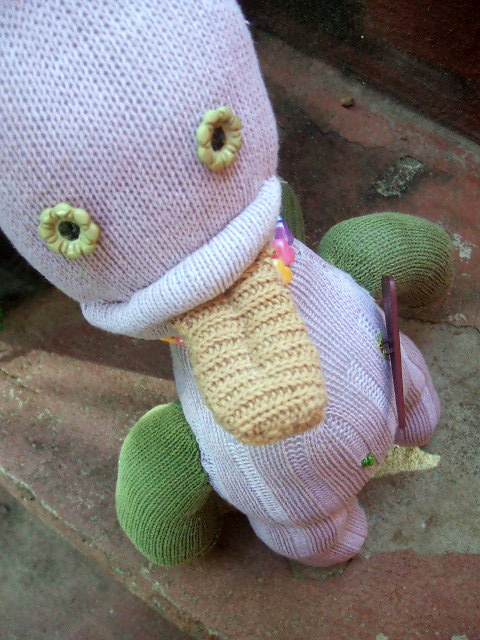
My son asked if he could take a photo of Osmond with my camera. I let him, and now look. I think his shot angle is far more artistic than mine!

My son asked if he could take a photo of Osmond with my camera. I let him, and now look. I think his shot angle is far more artistic than mine!

If you want to see more Stupid Sock Creatures, head over to the Stupid Creatures website and click on “Gallery.” They’re fantastic, and I think that making them may very well be addicting.

Stuff of the earth

Sometimes I think I ought to change the title of this blog, as its focus seems to be going away from strictly quilting and more toward crafty, fun things I like to do that also include quilting. But then again, I love the title, so I’ll probably keep it just as it is. 🙂

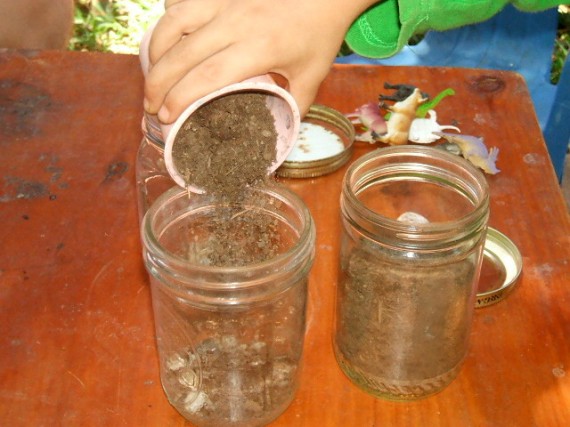
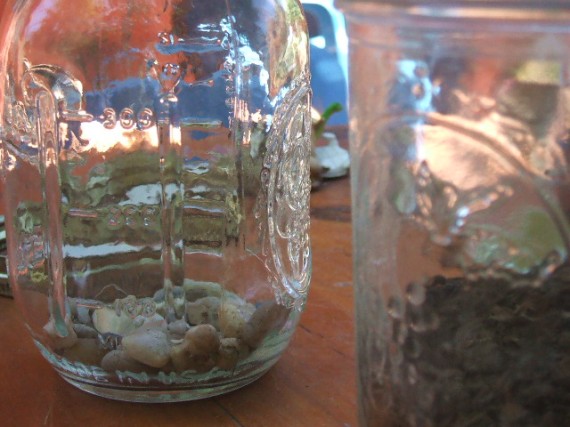
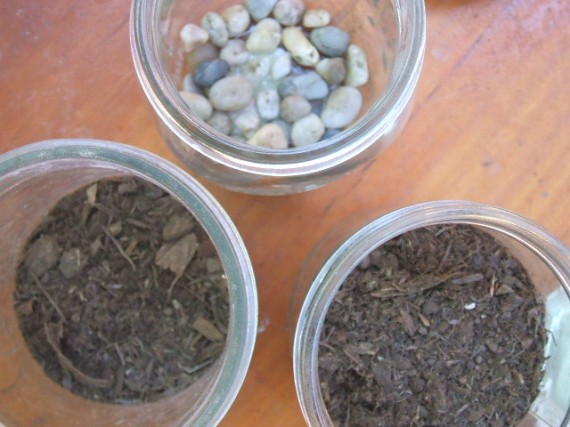
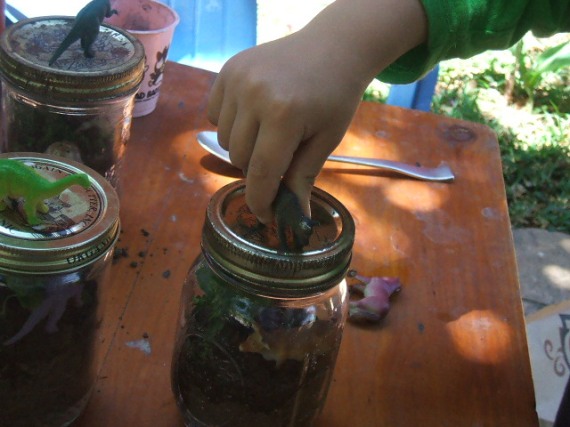
Yesterday I saw a post on Craft Magazine’s blog about making terrariums out of jars. I have a bunch of Ball jars from canning various things over the years, and I’m always looking for something fun to do with my son (who’s back to homeschooling, by the way!), so this was yet another perfect project. You can get the specific directions over there at Craft; otherwise, this is our photo diary of a really fun morning.

dscf2465

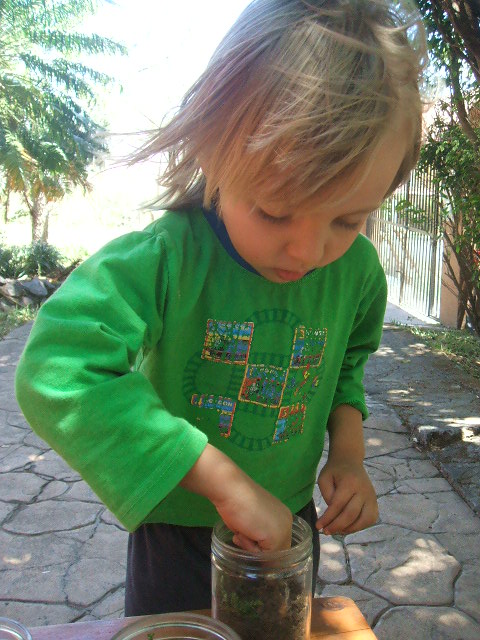
Pouring dirt into the jars...

We probably could have used more stones in the bottoms!

We probably could have used more stones in the bottoms!

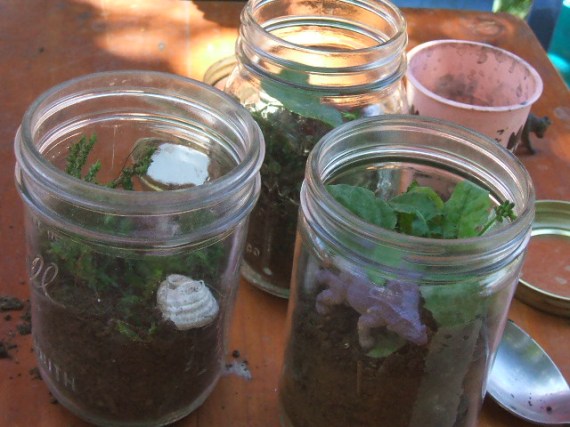
Three jars are better than one. A balance thing, I guess!

Three jars are better than one. A balance thing, I guess!

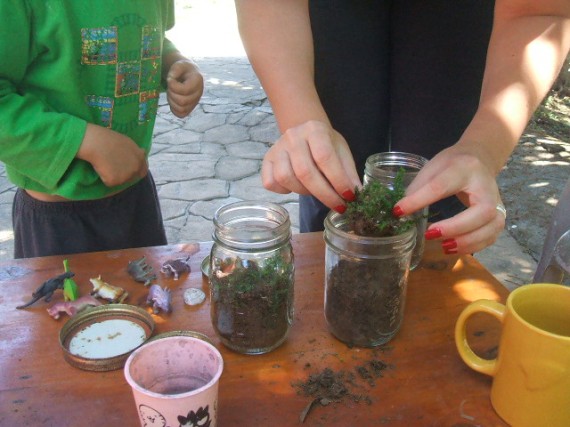
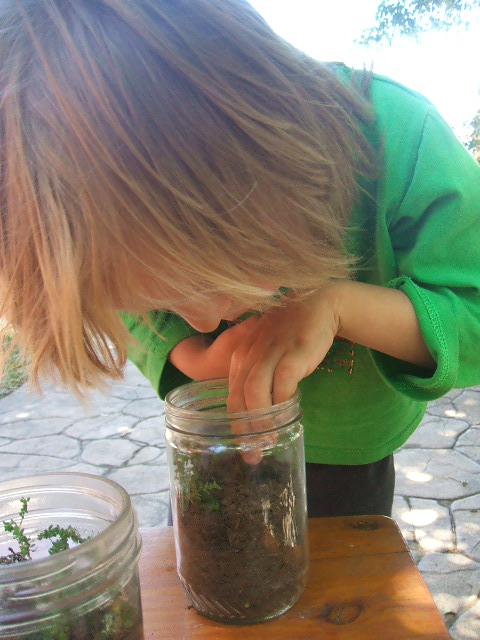
Here we are adding little plants to the jars.

Here we are adding little plants to the jars.

Ooh, someone needs a manicure!

Ooh, someone needs a manicure!

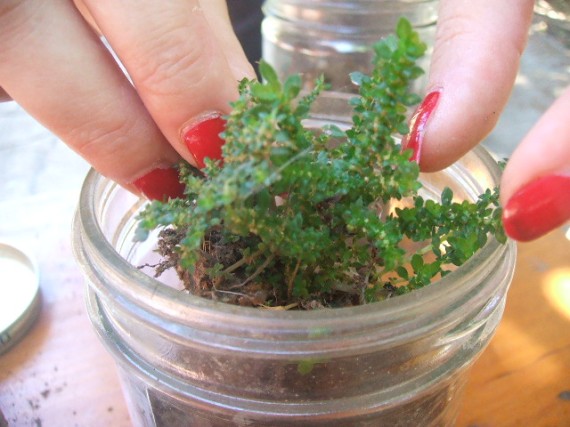
Adding more plants...

Adding more plants...

There! Just right!

There! Just right!

Ok, a little too much dirt, probably, but they're done!

Ok, a little too much dirt, probably, but they're done!

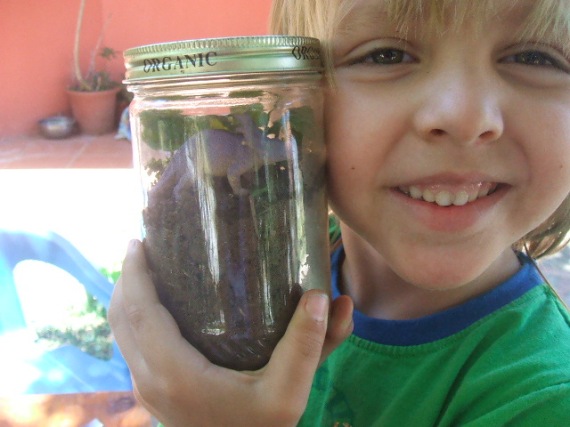
Proud of his creation.

Proud of his creation.

The little animals that didn't go inside get to play on top of the terrariums.

The little animals that didn't go inside get to play on top of the terrariums.

Child’s Art Smock from a Man’s Shirt

My little boy recently started kindergarten, and on the list of things he had to bring was an art smock (called a garbacha in Spanish, I had absolutely no clue what that meant!). Money has been tight lately (hasn’t it everywhere?), and luckily for me I just happened to have come across this fantastic post via forty-two roads via Craft’s blog on how to make a child’s art smock from an old shirt. The timing couldn’t have been more perfect, actually.

I also, as it happened, had a brand-new red shirt that was leftover from uniforms we had at our old cafe (somehow this one had never been embroidered with the cafe logo, so it was still sitting in its package in my sewing room). Again, perfect! Her directions are super clear, and I whipped this up in about an hour. I made a couple of minor changes, mostly because he’s going to be wearing it in class: I did end up hemming all of the raw edges on all of the pieces, and I also lengthened the ties that go around the tummy area (5-6 inches seemed way to short; I went with 12 inches and they still could have been longer — I suggest if you also make this smock to use pieces at least 2.5″ wide and 15-20″ long, and making the shoulder straps longer as well).

My son absolutely loves it, and he’ll definitely be the only kid in the class with this art smock!

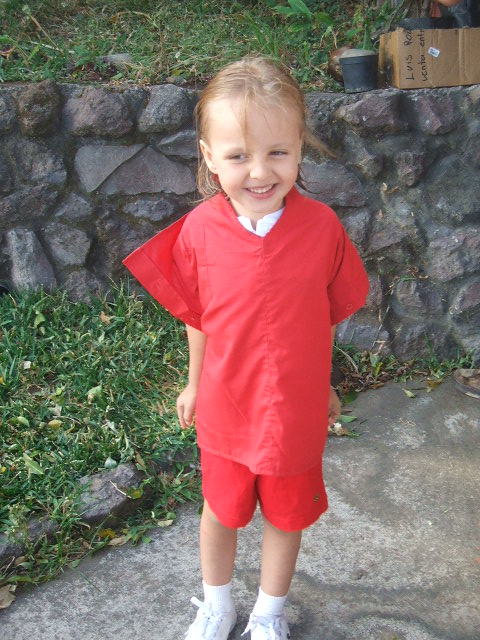
My kiddo in his new art smock. The color of the smock even matches his school uniform!

My kiddo in his new art smock. The color of the smock even matches his school uniform!

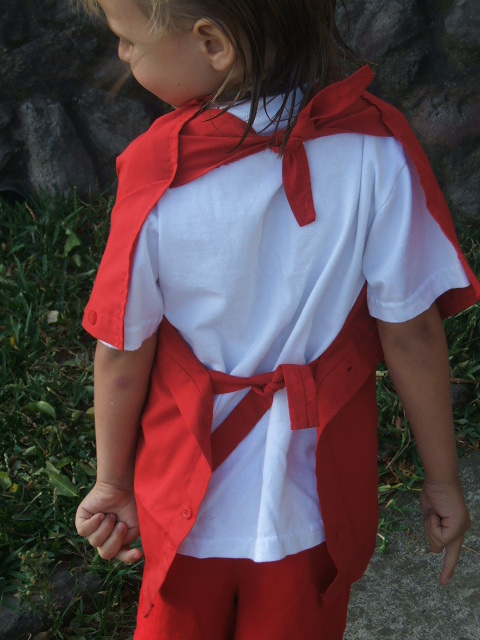
The back of the smock -- the ties are a little on the short side, so I'd make them longer if I made another one of these.

The back of the smock -- the ties are a little on the short side, so I'd make them longer if I made another one of these.

How I spent my Christmas vacation

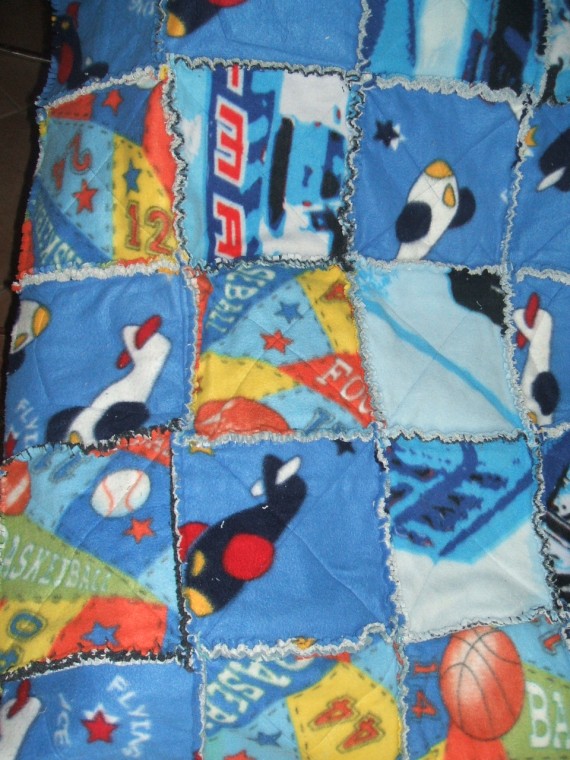
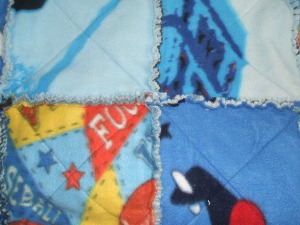
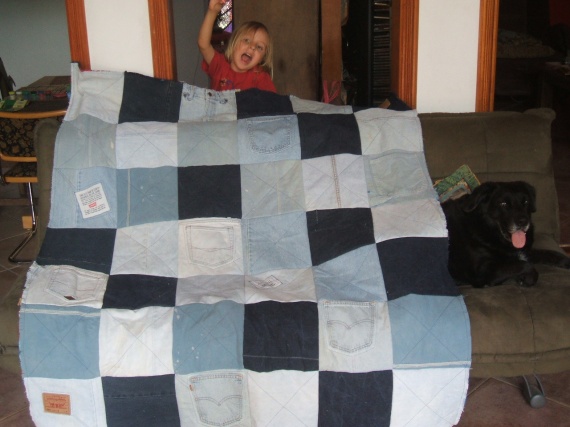
First, I fringed the back of my son’s jeans and polar fleece quilt, washed it, giving it that sufficiently “raggy” look, and gave it to him for Christmas (he loves it):

dscf2246

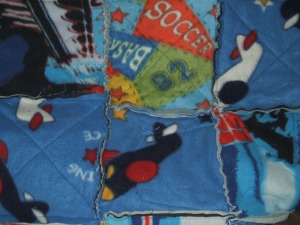
And a closeup of the ragged edges:

back of raggy quilt closeup

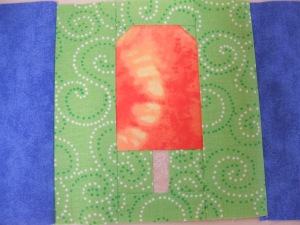
Then I made a row for Project Linus, using Quiltmaker’sLotsa Pops” pattern. I’m sending it after the first, when postage from Costa Rica goes down slightly. Here are two of the blocks. I noticed a mistake on the pattern, FYI, if you decide to make a row or a whole quilt. On page 4, which has the paper piecing pattern for the double ice pop, the rectangle B should be 1″ x 3-1/2″, not 1″ x 3″ as it states. But you’d probably notice that when you made the block anyway. This one reminds me of an orange creamsicle (mmm….):

orange creamsicle

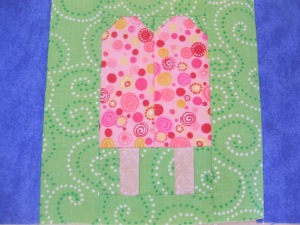
This one reminds me of one of those strawberry crunch pops the ice cream man sold from his truck (amazingly, there are still ice cream men here in Costa Rica! I got my son a fudgesicle from the ice cream man last week, in fact):

Double ice pop

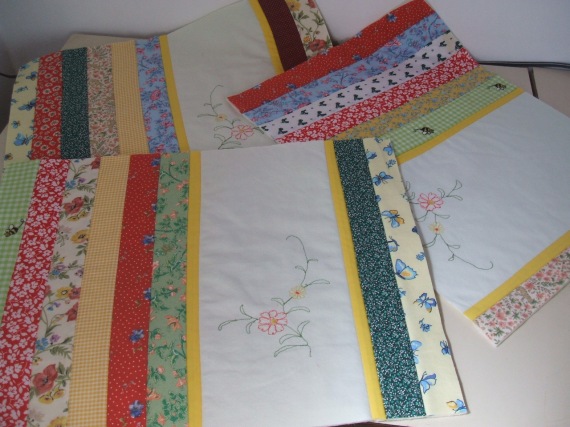
And finally, I did something I’ve been wanting to do for a while — I made something out of a sheet my MIL gave my husband and I years ago. It had beautiful embroidery on it, but it just didn’t fit in with our decor (and the cotton was heavy for a sheet in C.R.). A few months ago, I was going through some back issues of McCall’s Quick Quilts and found a pattern for making placemats out of vintage linens and 30’s prints (the March 2005 issue). Ah-ha! Lightbulb moment. So I cut up the sheet, using plain parts of the sheet as backing, low-loft cotton batting, and random strips of small and medium country-esque prints (I didn’t have many 30’s prints here at all). I think they came out super cute, and while I was making these, I also thought that you wouldn’t even need to use vintage linens to make this project. With all of the embroidery machines out there, if you have one of those, you could just embroider a vintage motif and use that instead. Or, how cute would these be for Christmas? Maybe with redwork embroidery and Christmas strips? So many ideas, so little time! As you can see, I still need to bind them, but I did at least square them up. So they’re almost ready to go:

vintage placemats

I still have the center piece of the sheet, which is a beautiful embroidered peacock surrounded by flowers. I couldn’t bear to cut it up. I may just frame it as artwork, which is what it is, really. Or perhaps use it as a center piece in a medallion quilt…

What projects did you get to work on over the holidays?

Happy New Year, everyone!

Rag Jeans and Polar Fleece Quilt

dscf2197

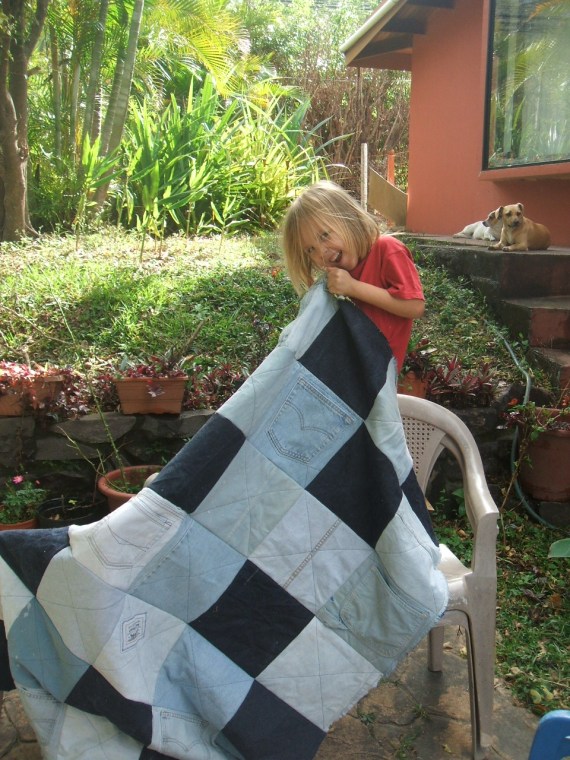
This is a quilt I’ve been wanting to make for a while, ever since I started saving old jeans, thinking that “someday” I’d do something with them. Then my MIL gave my son a few pieces of fleece (Spiderman, sports and airplanes), so I thought, why not make a raggy jeans quilt with all of it? Here’s how I made it:

I cut squares from the jeans that were about 9-1/2″; I chose that size simply because I had a square ruler that is 9-1/2″ so it made for an easy template! You could really make the squares any size you want. I did the same thing with the polar fleece, then matched wrong sides together, and quilted the blocks. For most of the blocks, I just did a simple X (one corner to the other), though I wanted to keep some of the jeans pockets on, and for those I basically just stitched around the pocket. The idea is just to hold the squares together. You don’t have to use batting for this quilt, so there’s no need to worry about it bunching up.

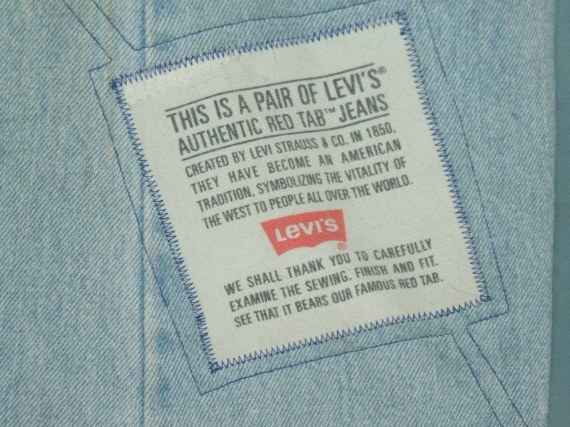
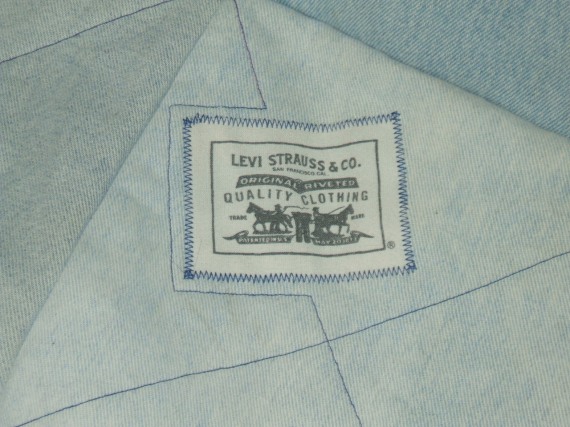
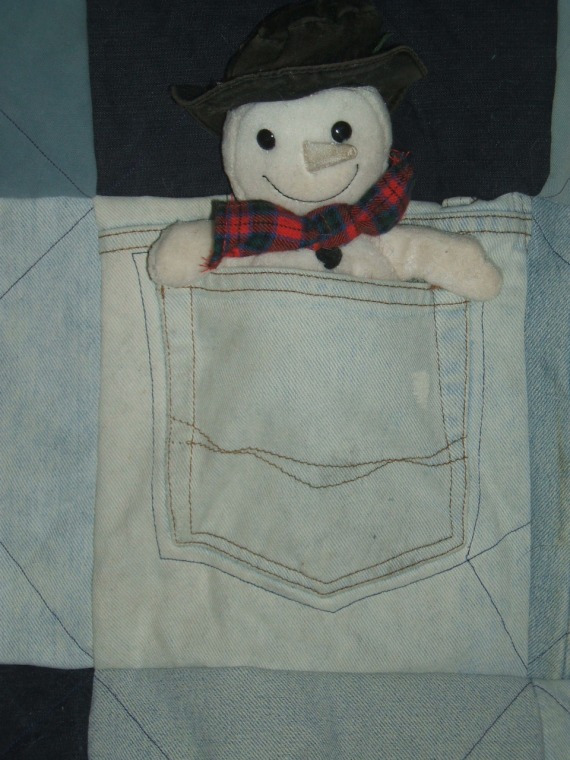
Besides saving some pockets, I also saved a couple of Levi’s tags. I liked showing some of the details of the jeans that you don’t normally see when you wear them, such as these two printed pieces inside a pocket on a pair of Levi’s:

dscf2200

dscf2199

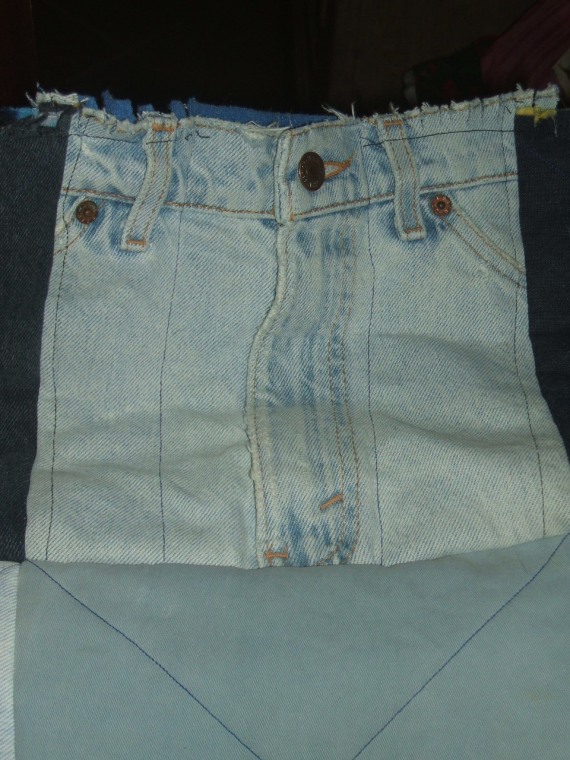
And, I used some of the denim wrong side out. This gave a little more subtlety with the blues, and also showed off some of the stitching that, again, one normally doesn’t see because it’s on the inside of the jeans. I even saved the front of one pair of jeans, sewing around the zipper and button so that my son (he’s 4-1/2) could zip and unzip and store toys inside and in the pockets.

dscf2202

dscf2203

While most rag denim quilts have the ragged side on the front (denim) side, I decided to rag the fleece (back) side instead. I did this because I thought that with the extra pockets and notions and things I’d stuck on the front, it would look too busy with the fringe as well. Of course, it might have looked just fine, but once it was sewn, there was no way I was going to take it apart!

dscf2204

I sewed the blocks together using a 1/2″ seam allowance, but of course this again is flexible. Some people use an inch or 3/4″; whatever seam allowance you use is what the length of the rag fringe will be. I sewed denim sides together, which made the rag side on the fleece side. If you wanted the denim to be the rag side, just sew the fleece sides together.

After putting all of the rows together (I made the quilt 7 rows of 6 blocks each, which makes a nice size lap quilt or throw for watching t.v.) comes the arduous task of snipping all of the exposed seams to get the ragged fringe. Basically, you just snip every 1/4″ or 1/2″ almost to the stitching on the seams. I’ve tried several different kinds of scissors, and for me the easiest to do this with is a pair of applique scissors. No matter what kind of scissors you use, your hand will probably get really tired after doing a few rows! This is the worst part of making the quilt, I think, but I just kept telling myself, “It’s almost done… it’s almost done!”

I love the way this quilt turned out! I probably spent about 8-10 hours total making it, so it’s definitely a project you could do in a weekend. I’ve heard that not putting fleece in the dryer keeps it from pilling; however, the whole point of a rag quilt is that the more often you wash and dry it, the raggier the fringes get. Plus, at my house, we have nine dogs and four cats, and at least some of them are going to be sitting on the quilt at any one time. So it will have to go in the dryer to get the pet hair off. I’ll just cross my fingers and hope for the best. You could also use flannel instead of fleece, which won’t pill. Anti-pilling polar fleece is also sold, but I am quite doubtful that is what my MIL bought. Oh well! It’s a quilt to be loved and keep warm, not to hang on a wall. If it pills, it pills! Que sera, sera!

dscf2198

Project Linus time!

Every year Quiltmaker magazine designs a new, easy pattern for Project Linus. If you don’t already know about this organization, they donate blankets to children in need, and especially children in hospitals. It’s a fantastic organization, and through Quiltmaker, you don’t even need to create an entire quilt to participate! Just piece together one row of the Lotsa Pops pattern (an adorable pattern of popsicles with alternating blue blocks) and send it in to the address given in the pattern by January 26, 2009. I’m challenging all of you out there to create one row and send it in — will you join me in helping to bring joy to a needy child’s life?

P.S. If the block in my paper piecing primer scared you, don’t worry, this pattern is extremely simple! It will give those of you who want to try paper piecing an easy pattern to try out.

Oh, crap.

I just realized, as I pulled out the baby quilt to get the top finished today, that I made a big mistake. This means frog stitching for me tonight! (Rip it, rip it, rip it!) Can you see what I did wrong?

The two bottom blocks need to be turned 1/4 so that the yellow HSTs are facing inward, like the top to blocks are. Sigh. And? I had already put the borders on (not in this picture). Double sigh. Oh well, I guess that’s the way quilting goes sometimes!

Print your own fabric

Have you heard about Spoonflower? It’s a cool new service that lets you print your own fabric! Right now they’re still in the beta phase, but if you sign up to get on the list, they will send you an invite at some point. I think I signed up about a month ago and got my invite yesterday.

How many times, quilters, have you said to yourself, “If only I had X fabric on hand…” I know I’ve thought it! So now I can print my own. What I’d really like to print are some photos, though it looks like the process for doing photos on fabric isn’t quite there yet. Though illustrations seem to look great so far. I know you all can think of a hundred things to do with your own fabric!

They print on Kona cotton from Robert Kaufman, and one yard of your very own fabric is $18 plus shipping, which I think is very reasonable. So check it out! And if I come up with a good idea for my own fabric, I’ll be sure to let you know.

A Paper Piecing Primer

Last night I showed my  mom how to paper piece (also called foundation piecing). She wanted to learn, and I had been saving up some of Linda Hibbert’s Wee Wild Animals, so I figured, what the heck.

Now, I think because paper piecing is quite a different way to quilt, that it can be confusing, and I know Mom wasn’t totally clued in to what I was doing. So I told her I’d take some photos, write out the directions, and put them here. Hopefully this will be helpful to more that just my mom! This is the method that works best for me; there are quite a few different methods out there; just find the one that works best for you.

A couple of notes: Linda Hibbert’s patterns are absolutely gorgeous, but definitely not for beginners! Some of the sections in the Wee Wild Fawn had more than 20 pieces in them. And they’re really tiny. So I’d suggest, if you’re new at paper piecing, to start with a star or other simple, symmetrical block. Also, make sure you set your stitch length very small — I have mine at 1.0. This will make it much, much easier to tear the foundation off later. Normal-sized stitches have a tendency to pull out when removing the paper. One drawback to tiny stitches is that, if you screw up, it will be oh-so-much-more difficult to frog stitch (you know, rip it! rip it!) and lay down a new piece.

And, finally, you can sign up over at Linda’s website for her monthly newsletter, and she’ll send you a link to a new paper piecing pattern each month. At the end of the year, you will have a fabulous set of blocks with which to make a beautiful quilt!

Here we go!

1. For this tutorial, I’m using section J of the Wee Fawn from Linda Hibbert. It has only a few pieces, and if you’re new to paper piecing, definitely start out with a pattern with only a few pieces in it!
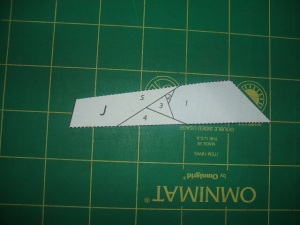
2. Start by cutting a patch of fabric for piece 1 that is at least 1/4″ larger than the shape itself (don’t worry about making an accurate shape; it really doesn’t matter! Also, with paper piecing, more fabric is better than less — it’s easier to cut off extra, but not as easy to add more if you end up short). Put patch 1 face DOWN
under the foundation, centered under the outline of patch 1. Patch 1 is the only patch you will lay face down; all the other patches go face up. Pin patch 1 in place.

3. Fold the pattern back towards you on the line between patch 2 and patch 1. This is your first sew line.

4. Take your ruler and align with the folded edge of the foundation (paper). Cut 1/4″ off of patch 1.

5. Now you need to get your fabric for patch 2. As I said before, patches 2 through whatever number you need for the piece will all be face UP. This is very important! If you are worried that you’ll get confused and put a patch face down, don’t worry, I’ve done it so many times I can’t even count them. And if you quilt at 2:00 a.m., you might be more liable to put patches on the wrong side up. Ask me how I know…

Align patch 2 with the straight side you just cut from patch 1. Make sure that when you flip the pattern back down, patch 2 will cover the area in the pattern marked 2. Then sew on line 2. I usually sew an additional 1/4″ both before and after the beginning and end of the line. Flip it over and press. You should have something that looks like this. Note the selvedge — it doesn’t matter, because it won’t show and I’ll cut it off later.

6. Repeat steps 3 – 5 until you’ve sewn all the pieces to the foundation. Remember to press the patches after attaching each one. And don’t worry about trimming the sides until you’re completely finished with the section (or block, as the case may be). Only trim the edge for the next patch as you’re ready to place it. In the next picture, I’ve folded the foundation back on line 3, and trimmed the first two patches to 1/4″ of the folded edge.

7. With some patterns, the numbers won’t necessarily be aligned next to each other, 1-2-3-4-5. They may be more like 1-2-5-3-4. Just be sure to do them in order, even if the order seems “out of order.” It really isn’t, though it may take some time and several blocks under your belt before you stop worrying about this (don’t worry, be happy!). When you’re all done, you should have something that looks like this next picture. Well, hopefully yours won’t look quite like mine, because as you can see, I shorted myself on fabric for patch 4. Oops! But I fixed it by attaching another piece of green fabric to the bottom of the section later. Some fixes are easy. Other ones, not so much. You can also see that after I finished attaching all the patches, I trimmed the entire piece to 1/4″ from the foundation edge. This makes it easy to attach the pieces to each other later.

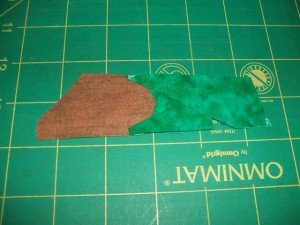
Finally, here is the finished Wee Fawn block! I love the way it came out. The great thing about paper piecing is being able to get all of those tiny details, as well as super-sharp points. New York Beauty blocks are the ideal paper piecing blocks. Now can anyone see the mistake I made in the finished block below?*

If you want to see some more paper piecing instructions and blocks, here are some links:

*I accidentally put a lighter brown fabric on the fawn’s back where a darker brown was called for. And didn’t notice until I had two whole sections sewn together. So I colored it in with a brown fabric marker, and I think it came out pretty well, don’t you?
Batiks, batiks!

I haven’t met a batik yet that I didn’t love. They are just gorgeous, and if you’ve ever wondered what goes into making batik fabric, check out this cool slideshow that I just found today from Robert Kaufman (for their Artisan Batiks line):

Tour the Lunn Studios Batik-Making Process

Batiks in Costa Rica are few and far between. You certainly won’t find them at the “old bolts” store (as I like to call my favorite shop that specializes in unsold fabric bolts — around $2 a yard for quality quilting fabric). When you do find them, they’re expensive. So they are a real treat to myself when I do break down and buy one (the last being a beautiful dark green leaf print by Princess Mirah Design at about $18 a yard).

I’m thinking of trying my hand at fabric dyeing. If anyone reading this has done fabric dyeing and has some hints for me, I’d appreciate hearing them! Any good books on the subject, what kinds of fabric dyes to buy, etc. Actually I don’t even know if I can get anything besides Rit dye down here! But hey, you do the best with what you have to work with, right?

-Raven